A Breakdown of the Whole Process
To clean greasy tools or an oily workbench, remove loose debris first, wipe away excess contamination, use a cleaner approved for the surface and then dry it as instructed.
The important detail is compatibility. A method suitable for a simple steel spanner may be unsuitable for a torque wrench, painted bench or electrical tool.
This guide covers routine oil and grease removal from ordinary hand tools and workbench surfaces. Equipment-specific instructions should take priority.
What you need before starting
Prepare the cleaning materials before spreading the contamination across a larger area:
- Suitable wiping rags or cloths.
- A cleaner or degreaser approved for the tool or surface.
- A suitable brush or scraper, where permitted.
- Fresh material for the final wipe or drying stage.
- Protective equipment specified by the cleaner’s label and your work procedure.
- An appropriate container for contaminated waste.
Kärcher’s professional tool-cleaning guide identifies grease-dissolving cleaners, rags and drying cloths among the materials used for hand-tool cleaning.
You do not necessarily need the strongest cleaner available. You need one that removes the contamination without damaging the item being cleaned.
Step 1: Check the tool and surface
Identify what you are cleaning before choosing the method.
Check for painted finishes, plastic or rubber handles, electrical components, moving mechanisms and manufacturer restrictions. Allow hot equipment to cool and follow any required isolation procedure.
Precision tools can have specific limitations. For example, TEKTON’s torque-wrench instructions specify cleaning with a dry, lint-free cloth and prohibit immersion in liquid or cleaner.
That is why a general recommendation to soak every greasy tool would be unsuitable.
Step 2: Remove loose dirt and debris
Remove loose particles before rubbing the surface with a cloth. Otherwise, the wiping action can drag debris across the finish.
Use an appropriate brush or other permitted tool for the task. Handle sharp chips and fragments with suitable equipment rather than gathering them with bare hands.
Keep cleaned components away from the dirty area. There is little value in cleaning a part and immediately placing it back on an oily bench.
Step 3: Wipe away the bulk oil or grease
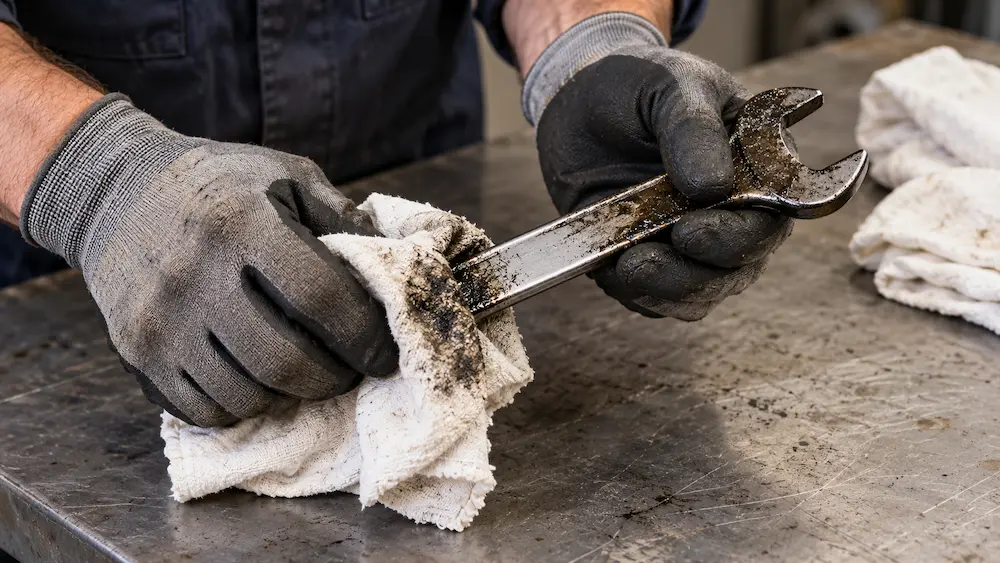
Use a suitable cloth to collect the loose contamination before applying the cleaner.
Fold the cloth so that you can turn to a fresh section as it becomes dirty. Replace it when it is saturated or starts transferring contamination back onto the surface.
For ordinary greasy hand tools and compatible bench surfaces, general-purpose cotton wiping rags can be a practical consumable. Thicker absorbent rags may suit tasks where liquid pickup is the main requirement.
The cloth collects contamination; it does not automatically remove the remaining oily film.
Step 4: Apply the cleaner according to its instructions
Follow the product’s directions for dilution, application, contact time and removal.
Different degreasers have different requirements. WD-40’s overview of commercial degreasers illustrates that cleaning products can require different application and rinsing methods.
Where appropriate, test a small, inconspicuous area before treating a larger coated surface. This does not replace the manufacturer’s compatibility instructions.
Avoid flooding assembled tools or letting cleaner enter mechanisms, electrical components or other areas where it is not permitted.
Step 5: Remove the loosened contamination
Wipe with a fresh cloth section or a new cloth as needed.
Work in manageable areas so that you can see whether the contamination is being removed. A cloth that is already heavily loaded with grease may simply spread it.
Remove cleaner residue using the method specified on the label. Some products require rinsing; others have different removal instructions. Do not assume that every degreaser can be left on the surface.
Step 6: Dry, inspect and store
Dry the tool as instructed and inspect it before returning it to storage.
Look for remaining contamination, damage and areas where moisture may have collected. MOTORHEAD’s hand-tool cleaning guidance emphasises thorough drying and dry storage after cleaning.
If the tool manufacturer specifies lubrication or another protective treatment after cleaning, follow that instruction. Avoid leaving grips or handles oily.
Degreasing removes contamination. It does not repair corrosion, damaged coatings or worn mechanisms.
How to clean an oily workbench
A workbench needs a slightly different workflow because clean parts may return to the surface immediately.
- Clear the bench. Move parts, paperwork and tools to an appropriate location.
- Remove loose debris. Use suitable equipment for chips and other sharp material.
- Collect excess oil. Wipe it up without spreading it beyond the affected area.
- Clean in sections. Use a product compatible with the bench’s material or coating.
- Remove residue. Follow the cleaner’s instructions, then dry as required.
- Check before reloading. Return clean items only when the surface is ready.
A wooden, painted or coated bench may need a different cleaner from a bare steel surface. Avoid treating all worktops as chemically interchangeable.
Common cleaning mistakes
Using one dirty cloth throughout the job. Change the wiping surface when it stops collecting contamination.
Choosing a cleaner without checking compatibility. Handles, coatings and mechanisms can have different restrictions.
Putting tools away while damp. Complete the drying stage before storage.
Mixing clean and dirty work. Keep finishing cloths and cleaned components separate from oily cleaning materials.
Frequently asked questions
Can I clean greasy tools with water?
Some tools allow water-based cleaning, while others have stricter requirements. Check the tool and cleaner instructions, including any drying requirements. Do not assume an assembled or precision tool can be immersed.
Should I use cotton rags or paper towels?
Either may suit an approved cleaning task. Consider how much contamination needs collecting, whether fibres matter and how much material the job consumes. Industrial paper wipers also differ from ordinary household paper towels.
For routine workshop wiping, contact Texscale with the surfaces you clean, the contamination involved and your expected quantity. We can help identify a suitable wiping-rag grade.